

You may remember me mentioning that I was going to be getting an iPhone soon. Perhaps you don't remember, but any matter, I didn't end up doing that. You see, my brother was getting a new phone and so I had my eyes on the iPhone he was going to get rid of. But I thought about it a bit and decided Will needed a smart phone more than I do, so he ended up with it. I did get Will's iPod touch out of the deal though! Which is actually really nice. Especially considering I was still running off a 2nd gen iPod touch (you know the gen before they added the camera) that didn't even update anymore.
Of course, as soon as it was mine, I wanted to swap out Will's case for something more me. And more pretty. So I looked online a bit, and guess what? Nice designer cases are actually pretty expensive. Even simple ones. So, being the crafty being I am, I figured I could just make something. I found a great deal on a clear case ($2.00 and free shipping, yes please) and ordered it with the intention of doing something like this, but as soon as I sat down to make it I thought, "As pretty as this is going to be, I'll probably still get bored of it in a week." So I made my designer case changeable. And it was so easy peasy. See how I made it below.

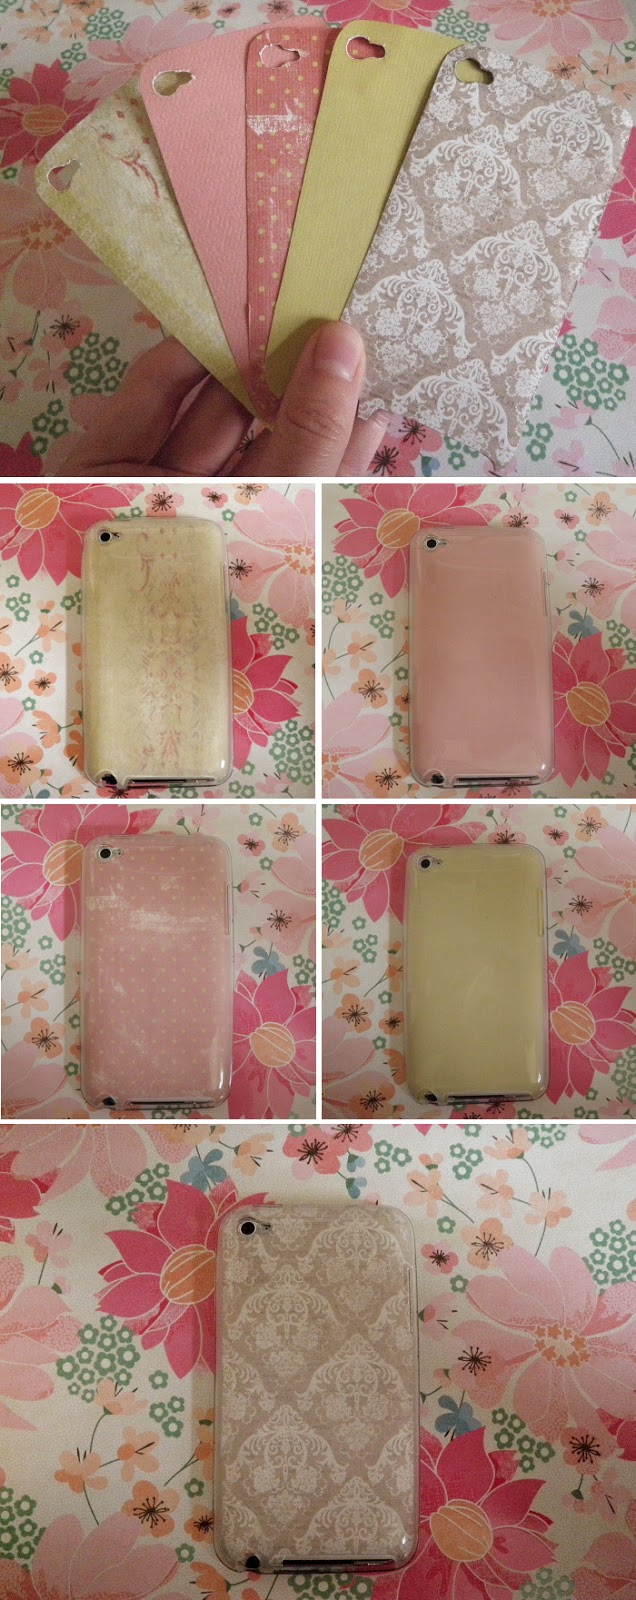
1. What you'll need: a clear iPod or iPhone case (I got mine from this website), scrapbook/craft paper, a pencil, fine-point scissors, an exacto-knife, mod podge and a paint brush (both optional).
2. Begin by making a stencil. This will save you from making mistakes on your pretty paper and help you get an accurate fit. Use a lightweight paper to do this, like printer paper. Place the clear case down onto the paper and trace around it. Cut out the traced shape.
3. Slide your cut stencil into your clear case. Hold it flat against the back with your hand and trace the areas you will need to cut out, like around the camera and the USB and headphone ports. Remove the stencil from the case and cut these small areas out using an exacto-knife to be precise. Trim down the sides if needed.
4. Transfer your stencil onto the scrapbook paper of your choosing. Cut out around the image. Tip: Although I traced the smaller areas to cut out, like around the camera, I placed each piece inside the case before cutting those areas just to be extra sure that they lined up with the corresponding holes. Some paper lies differently than others when place between the case and the iPod/iPhone, so I really recommend this step if you don't want to have to start all over again.
That's it! Cut out as many different interchangeable designs and colors as you'd like.
If you would like to make the paper design permanent, simply apply the scrapbook paper to the inside of the clear case using a few coats of mod podge and let dry completly.

This is the one I am currently using. How pretty is that paper!? I love it. But I love that if I don't love it forever I'll be able to use something new without having to buy something.

No comments :
Post a Comment