Showing posts with label crafty things. Show all posts

Grab a Drink & Eat Up Darling | DIY


I have the easiest DIY ever to share with you today. Like, seriously, if you have a sharpie and a scrap piece of wood (that's just been lying around, sadly, begging you to use it for months) then you're already halfway done. Open up that sharpie and write some pretty words on the wood and you're really done. And you've got something cool and unique to spruce up some wall space. I've been sprucing up all sorts of corners of our apartment lately. I'm finally putting up some of the art and prints that we've had lying around — not knowing where to hang them. Something about Will being gone all this week (for work) has me a little stir crazy, or cabin feverish. But hey, I'm getting things done. I digress.

There is this awkward door in our apartment's kitchen. Literally every single person we've had over for the first time, when getting a tour of the place, opens this door and goes "Oh, what's in here?" expecting to find a full pantry. Or maybe a stacked washer and dryer. But they are all quickly disappointed when all there is to see is a giant water heater; that's all that's back there. Sorry, guys. This is apartment life. To top it off, the disappointing door is framed by an off-center air vent and a crooked phone jack. I hung the sage branch not long after moving in, to try and fill the dead space next to it, and balance it out a bit. But despite the pretty branch, this little section of our kitchen has always seemed off to me. So today I hung this Let's Stay Home print (from Maiedae) and made a little wooden sign (inspired by this) to hang as well. I think it makes quite the difference.

See how I easily made this kitchen sign below.


SUPPLIES NEEDED

+ scrap piece of wood
+ printer + computer
+ text editing software
+ printer paper
+ a sharpie

INSTRUCTIONS

+ Measure you scrap piece of wood (mine measured 12in x 5in).
+ Choose/create a phrase to use.
+ Using a text editing software, chose the font (I used Tamoro Script) and layout for your phrase of choice.
+ Be sure to keep the entire layout within the measurements of your wood piece.
+ Print out your phrase onto plain printer paper.
+ Trim down the paper to fit the wood piece and tape in place.
+ Trace directly over the phrase with a sharpie, pressing firmly.
+ The sharpie will bleed through the paper and lightly mark the wood.
+ Remove the paper and, using your print out as a reference, completely fill in the phrase with the sharpie.


Grab a drink & eat up, darling.
xx Emorie

DIY Cardboard Piñata


Last Tuesday was my mom's birthday and we planned a lovely little party for her to celebrate. Because it was a weeknight, we decided it would be fun to cook her dinner at her own home. What's better than a birthday party that comes to you!? We cooked some of her favorites; she's a huge fan of Mexican food, so the menu included fish tacos, fresh pice de gallo and guacamole, and chocolate angel food cake for dessert (my sister, Bee, is the best baker ever).

When I sent out an invitation to my mom telling her the details, she responded enthusiastically and made a joke about a piñata filled with laffy taffy. Keep in mind she had no idea the menu was Mexican food and that her party would be fiesta themed. I don't take piñata suggestions lightly, especially when it fits a party theme so perfectly! So, naturally, I made her one. And filled it with laffy taffy, obvi.


I contemplated just simply buying a piñata, but I was surprised by how expensive a classic donkey piñata from Target was. I ended up buying all my supplies as well as the candy to fill it from the dollar store for $6.00. That's half of the price of just the piñata! Plus, I'm sure you might have some of these supplies already taking up space among your craft supplies. Especially since I used cardboard to eliminate the time required for paper-mache. If you're confident in your craftiness, I highly recommend going the DIY route. I mean, it is going to get smashed anyway :) See how I created this colorful piñata below.


DIY PIÑATA:

SUPPLIES NEEDED

+ large pieces of cardboard (I used one of those big display boards, but a large cardboard box would work great)
+ streamers in different colors
+ duct tape & masking tape
+ a sharpie
+ scissors
+ craft glue
+ twine or rope (to hang)
+ assorted candy (to fill)

INSTRUCTIONS
+ Make sure you have two large pieces of cardboard of equal size. Sketch out the shape of the donkey's body with a sharpie. Once satisfied with the shape, cut it out. Use the cut out piece as a stencil and trace the shape onto the other piece of cardboard. Cut this out as well. You should now have two identical donkey shapes.
+ You will use the remaining scraps of cardboard to create a frame between your two donkey pieces, creating a 3D piñata. Cut strips the lengths of all the sides of the donkey's torso. Secure these pieces to one side of the donkey, using duct tape on the inside and masking tape on the outside.
+ Fill the piñata with candy.
+ Secure the other side of the donkey to the rest of the piñata, reinforcing all of the corners and joints with extra tape.
+ Pull out a few feet of streamers and fold it the length up onto itself as many times as you can. Fringe the streamers by cutting half way up them.
+ Cover the entire outside of the piñata with the fringed streamers. Start at the bottom of the legs and work up. Overlap the previous streamers a bit every time. Switch colors after a few rows of the same color have been glued.
+ Once everything is dry, your piñata is ready to hang!

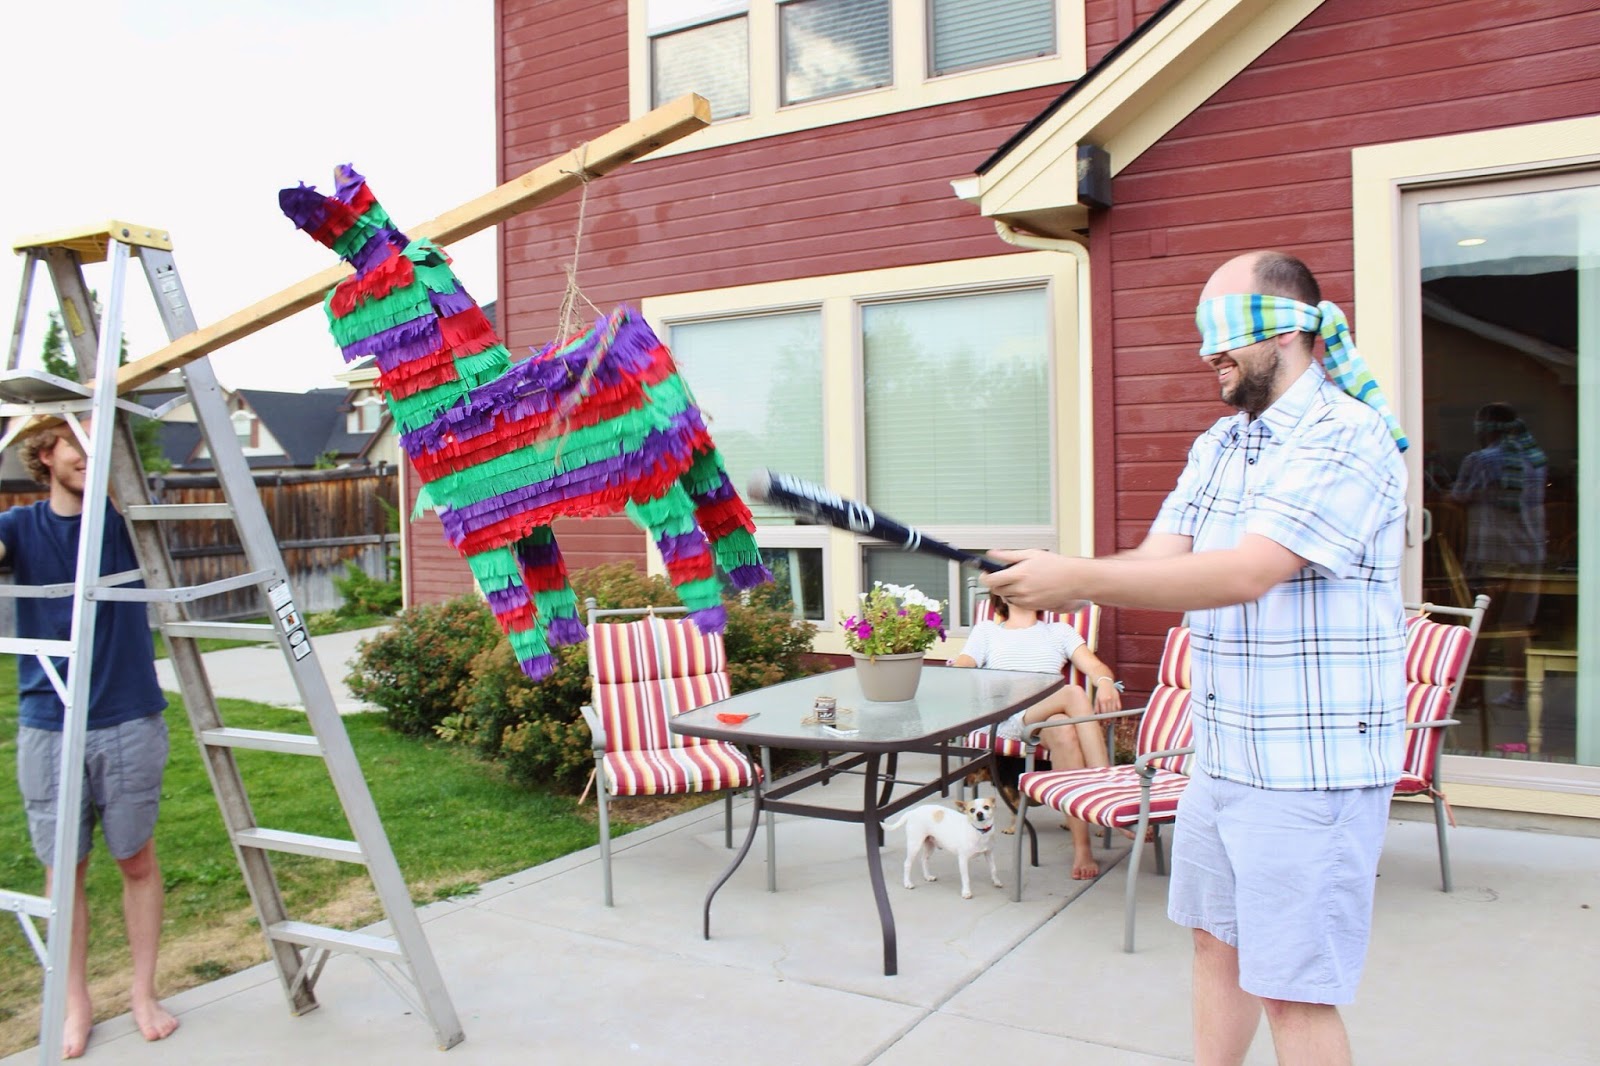
A few pictures of the piñata in action below:


Our blindfold just happened to match my mom's outfit perfectly. She had the first go at it, followed by an entertaining round by my brother-in-law, and my sister ended up breaking it open by channeling her work frustration ;) (I got a video of that one). Overall, I'd call this first piñata making endeavor a success! A special thanks to Will to holding the beam for us, as I had to use a ladder due to my mom's yard having no large trees.

Hope your Monday is treating you well!
xx Emorie

Little Notes Birthday Card | Free Printable


Will's birthday was about a week ago, and we celebrated it simply (but lovely) as per usual. After making the little booklet 25 Reasons Why I Love You instead of a card for Will's birthday last year, I wanted to do something equally as cute and sentimental. What better day do you have to show the person you love just how much you love them — in a cute way — than on their birthday?! You know, in addition to Valentines and anniversaries and any day you feel like it, of course!

I first thought of making a little booklet again, but full of love notes and memorable pictures, like this Love Notes Photo Book. But then I thought of making little envelopes for each love note and the idea took off from there! I thought the result was super cute! But I kept the design really simple, too. I think you could use this card for several people, not just your significant other (as long as you're cool with calling them darling). You can fill the envelopes with whatever you fancy, not just love notes. Like confetti! Or folded pieces of money! Or a gift card (you'd need a bigger envelope....)! You know, birthday type things :)

Get the link to the free template, and see how I made this card, below!


WHAT YOU'LL NEED

✓ the card template (download to print ➞ here)
✓ the mini envelope stencil (download to print ➞ here)
✓ different colored papers to make the envelopes
✓ a glue stick
✓ masking or washi tape (optional)
✓ scissors
✓ pens, markers, etc. in various colors


WHAT TO DO

1. Print the card template and the envelope stencil
2. Fold the card in half — there is a line down the center on the template to make this easier
3. Cut out the envelope stencil
4. On various colored pieces of paper, trace the envelope stencil
5. Cut out your mini envelopes (6 in total)
6. If desired, draw patterns on some of the envelopes
7. Fold the envelopes and secure the sides — I found it easiest to tape the sides and bottom of the envelopes together (on the inside, so the tape is not seen)
8. Glue the envelopes into place on the card — there are spots designated by rectangles to make this step easier and to get perfect spacing
9. Take your envelope STENCIL and cut the folded bits off (so you have just the rectangle remaining)
10. Use this small rectangle piece as a stencil to cut pieces of paper to slide into the envelopes
11. Fill the envelopes with notes, or whatever you desire
12. If you have difficulty keeping the envelopes closed, use little bits of masking or washi tape to secure them
13. Write a message on the inside of the card, too. and you're good to go!


Happy card making and birthday celebrating!
xx Emorie

Inspired Branch Banner DIY


There is quite a story behind this simple banner. Let's begin with the branch; it was once a lovely, large pussy willow. It sat in my sister's bedroom in my very first apartment that I shared with her and one other roommate. The next year, when her and I shared a basement apartment, it filled up an empty corner in our living room. When she moved out she told me to keep it. I took that pretty branch with me when Will and I moved in together for the first time. Again, it filled up a hole in a room (behind our sofa) perfectly for us. When we moved down to Boise together, when only took with us what we could fit in the back of the 4 Runner and in the tiniest and cheapest U-Haul trailer we rented. My heart sunk a bit when the few things we had left that wouldn't fit included the pussy willow, as it had been such a dutiful decorative piece. Well, Will took one last minute to strap it on top of our cooler (that was strapped between the trailer and the car) and we agreed to just see if it would make it. I spent the 6 hour drive watching that branch bend under the wind pressure and loose all it's fuzz. I refused to throw it away and it sat in my parents garage the last two years.

When we moved here I found it again and pledged to use it in some way. At first, I simply broke off a few of the smaller pieces and placed them in a jar —along with some birch pieces— for our coffee table. Then, of course, the poor bare branch sat in a corner beside my craft table for weeks. I then decided I wanted to use it to hang some sort of decorative piece on our wall. Then I saw this No-Sew Resolution Banner and couldn't get it out of my head. Although I decided to do a different style and technique for my banner (mine is sewn). I couldn't get that phrase out of my head. It seemed perfect for me, for us, and for our place. It fits it's place on our wall perfectly, hinting at the beautiful hillside right out the window it hangs beside. And I chose orange, to balance out the orange stucco outer walls of our apartment with the orange in the pair of chairs in our living room.

I'm absolutely smitten with the result. See how I completely created this banner below.


BRANCH BANNER DIY

Supplies Needed               

+ Printed fabric for the banner
+ (Coordinating) Solid fabric for the text
+ Sewing machine, and needle and thread
+ Scissors
+ Pen or marker and long ruler
+ Pins
+ Fabric glue
+ A branch
+ Thick hemp or thin rope
+ Power drill and drill bit (optional)

Instructions                       

1. Determine the length and width you would like for the banner. Mine ended up being 18 inches wide by 13 inches long, with a 7 inch tall triangle on the bottom. Cut two rectangles large enough to accommodate this desired size, plus room for seam. For example, my rectangles were around 19 inches by 21 inches.

2. Place the cut rectangles on top of one another, the right side (the side of the fabric you want showing) towards each other. So the insides should be on the outside. Using the ruler, draw a straight line across (horizontally) where the bottom of the banner should be before the triangle part begins. This will help you know how far down to sew the sides. Pin the two pieces together and sew up the long sides (sewing the two pieces together) to where you marked.

3. Fold the now sewn together fabric in half to determine where the middle is (shown in second picture). using your ruler, to insure straight lines, mark slanted lines toward the center of your fabric with a pen. Cut along these lines; this will create the triangle shape on the bottom of the banner. Pin in place (shown in third picture) and sew the two pieces of fabric together here too. You should have a giant triangle pocket after this step.

4. Using some scraps, create the straps for hanging your banner. I chose to use two straps instead of sliding the branch through a sleeve, so that the branch is exposed and visible. Cut two rectangles twice as long as you would like your straps to hang and twice as wide as you would like them to be. Fold in half lengthwise, so the backside of the fabric is showing. Pin and sew closed. Turn the tube right side out when done and iron them to lay flat.

5. We will now sew up the top of the banner (the pocket, open-end). Place the straps (now turned right-side out!) inside the two sides of the banner (shown in fifth picture). Push them up against the seam, so that the will be straight. Pin the two sides together, with both straps in place on either side.

6. Sew the top closed. Leave about a hands-width in the middle so that you can turn it all right side out! Turn the banner right-side out and push all the seams and corners flat and straight, use a pencil to help with the corners if needed. Use a blind stitch to close the gap you left. Use your iron again to get all the seams to lie flat and eliminate any wrinkles.


Instructions Continued        
7. You can skip these next three steps if you'd like to free-hand your font. You may want to consider making a drawing, to scale, of your banner on paper and then creating a mini grid within it. Accommodate for all the letters you are using and make a grid space for each one See an example here. This will help determine the size font to use. I ended up using a 225 font size, making my letters around 1 inch wide and 2 inches long. Print your chosen phrase out on printer paper and cut out around each one.

8. Pin each letter to your second fabric. I used an old cotton t-shirt the same color as the secondary color in my print. Felt would be much easier to warm with. Carefully cut out each one.

9. Position the text how you would like; you can see that I changed my mind with how I wanted to arrange them, deciding on a separate line for each word. Glue each letter to the banner using fabric glue. And hey, Mod Podge works pretty well too - just saying. Add on some accents too, if desired.

10. You can skip these last three steps if you'd rather simply tie your hemp or rope around the branch to hang. Prepare your branch to drill by placing it on a safe surface. You will likely be able to tell right away when you go through the other side, but just incase I recommend doing this on the floor. I place a thick piece of cork under me topped with a piece of craft paper to catch the sawdust.

11. Drill, baby, drill. Make sure to use a drill bit no larger than 1/3 the width of your branch, always go smaller if unsure — you can always easily widen it. Clean up the hole when satisfied with it's size.

12. Thread your banner onto your branch first. Then, thread your hemp or rope through and tie a knot on either side of each hole. Cut the extra hemp/rope off and you are ready to hang!


Doesn't it fill up that empty, awkward wall space — next to my birch branch — perfectly? I think so. I'm now considering putting a different phrase on the other side so I can switch it up from time the time. Any phrase suggestions? And remember,  if your wanting a simpler, quicker DIY check out my inspiration for this project the No Sew Resolution Banner.

xx Emorie

Easy Wire Shelving Storage Hack


There is a wonderful little area in our new apartment, separated a bit from the rest of the open layout, with vaulted ceilings and a skylight that we are using as an office. It has an extra little nook with some shelving. I've placed a separate desk here and am dubbing it my own craft cubby. It is such a wonderful creative corner for me already, and the added bonus of the shelving means that I am able to store absolutely all of my supplies in this one small area. Finding decent amounts of storage in apartment living isn't always easy to come by, and while I am very grateful for the (ample) amount of storage this place provides — wire shelving isn't always the most fun to work with. Especially when what you are wanting to store is things that can easily fall through those spaces; like books, notebooks, and craft supplies. I made some obvious choices to make my craft organization easier, utilizing bins, baskets, and boxes (that I already had) that can easily be pulled down when needed. I also came up with the simplest solution for keeping my notebooks in place up there, too.

I quickly discovered that I didn't want to just lay them flat to prevent fall-through. While stacking them horizontally would have been the easiest answer to the problem, it took up much more space than having them vertical, and I couldn't justify that. It also would be a bit of a pain when I wanted to pull one of them down to use. I then determined that putting something below them would work well, but I also needed to secure them (still without taking up space that could be used for storage)—because the bin beside would be removed often (as it also stores things).

The result of all of these needs is the simplest engineered storage solution you can imagine. Simple, and does it's job perfectly.


I simply threaded some sturdy string (I used red hemp) through the wires to creates a barrier to hold up the notebooks. To do this, begin by tying a tight knot on the top shelf. Then thread the string through the bottom shelve and again through the top, tightening and spacing it evenly as you go. You can continue all the way to the end, or at least halfway, and tie another knot to secure it all. Tie the ends up, too. Next, I cut a piece of cardboard to fit the space and slid it in between the wall and the string. Easy Peasy. Now my notebooks stack together (side by side) nicely and stay up securely at all times. And I am happy and organized.

Do you have any creative storage ideas? Share them with me in the comments.

I'll be back soon with DIYs and peeks at my new place!

xx Emorie